Introduction
Root canal therapy (RCT) is a crucial dental procedure used to treat infection and preserve the functionality of a tooth. The mandibular central incisor is one of the smallest teeth in the mouth but plays a significant role in aesthetics and function. Performing a root canal on a mandibular central incisor requires precision, anatomical knowledge, and the right technique. This blog will guide you through the step-by-step procedure of performing a root canal on a mandibular central incisor, covering essential diagnosis, anesthesia, canal preparation, obturation, and restoration.
Understanding the Mandibular Central Incisor Anatomy
Before performing a root canal on the mandibular central incisor, it is essential to understand its morphology:
- The mandibular central incisor is the smallest tooth in the dental arch.
- It typically has a single root and a single canal, but bifurcated canals may be present in some cases.
- The root is narrow mesiodistally but wider labiolingually.
- The pulp chamber is relatively small, making precise access cavity preparation crucial.
Step 1: Diagnosis and Case Selection
Proper diagnosis is the first and most critical step. A root canal is indicated in cases of:
- Pulpal necrosis
- Irreversible pulpitis (severe pain, spontaneous, lingering sensitivity)
- Periapical abscess or lesion
- Trauma or fracture exposing the pulp
Diagnostic Tools
- Clinical Examination: Look for caries, discoloration, fractures, or swelling.
- Percussion and Palpation: Assess pain response when tapping the tooth.
- Thermal Testing: Cold and heat sensitivity tests help determine pulp vitality.
- Electric Pulp Testing (EPT): Determines if the pulp is vital or non-vital.
- Radiographic Examination:
- Periapical radiographs help visualize root morphology and periapical conditions.
- Cone-beam computed tomography (CBCT) can help in complex cases.
Step 2: Local Anesthesia and Isolation
Anesthesia Administration
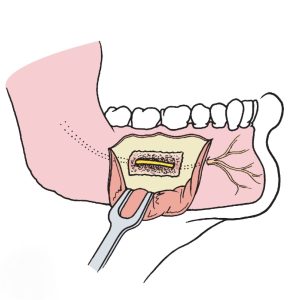
- Inferior alveolar nerve block (IANB): Since the mandibular central incisor is innervated by the inferior alveolar nerve, an IANB is the most effective anesthesia.
- Supplemental Infiltration: If needed, lingual and labial infiltrations can enhance anesthesia.
- Intraligamentary Injection: Used in cases of persistent pain.
Rubber Dam Isolation
- Placing a rubber dam prevents contamination and improves visibility.
- Use a clamp or floss ligation for proper isolation.
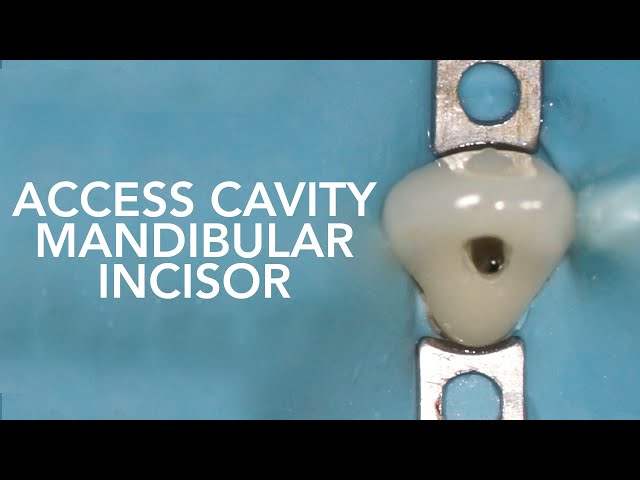
Step 3: Access Cavity Preparation
The goal of access cavity preparation is to achieve straight-line access to the root canal system.
Technique:
- Outline Form:
- The shape of the access cavity is oval and is made on the lingual surface.
- It should extend just beyond the cingulum without excessive removal of tooth structure.
- Dentin Removal:
- Use a high-speed round bur to penetrate enamel and dentin.
- Use an endodontic explorer to locate the canal orifice.
- Cleaning the Pulp Chamber:
- Remove necrotic pulp tissue using barbed broaches.
- Ensure pulpal floor integrity.
Step 4: Root Canal Instrumentation and Cleaning
Working Length Determination
- Use an electronic apex locator (EAL) or radiographs to determine the working length.
- The working length is usually 19–21 mm for a mandibular central incisor.
Canal Shaping Protocol
- Manual Files: Begin with #10 K-file to establish a glide path.
- Rotary or Reciprocating Instruments: Use NiTi rotary files (e.g., ProTaper, WaveOne) for efficient shaping.
- Crown-Down Technique: Start with a larger file and progress to smaller sizes.
Irrigation Protocol
- Sodium hypochlorite (NaOCl) 2.5%–5.25% for antimicrobial action.
- EDTA 17% to remove the smear layer.
- Saline or distilled water for final rinse.
Step 5: Obturation (Filling the Canal)
The canal must be completely sealed to prevent reinfection.
Obturation Techniques:
- Cold Lateral Condensation:
- Use gutta-percha points and endodontic sealer.
- Lateral condensation ensures a snug fit.
- Warm Vertical Compaction:
- Preferred for a denser seal.
- Uses heated gutta-percha for better adaptation.
- Single Cone Technique:
- For narrow and straight canals.
Common Root Canal Sealers:
- AH Plus (epoxy resin-based)
- MTA-based sealers
- Zinc oxide-eugenol (ZOE) sealers
Step 6: Post-Treatment Restoration
A successful root canal must be followed by proper coronal restoration to ensure tooth longevity.
Restorative Options:
- Composite Resin Filling: For minimal tooth structure loss.
- Post and Core: If extensive damage is present, a fiber post can reinforce the tooth.
- Crown Placement: A full-coverage ceramic or PFM crown is recommended for strength and aesthetics.
Post-Operative Care and Follow-Up
Post-Op Instructions:
- Avoid biting hard foods for 24–48 hours.
- Take prescribed analgesics and antibiotics (if necessary).
- Maintain oral hygiene and attend follow-up visits.
Follow-Up Visits:
- 1-week follow-up to assess healing.
- 3-6 months radiographic evaluation to ensure complete periapical healing.
Conclusion
Performing a root canal on a mandibular central incisor requires a systematic approach, from accurate diagnosis and careful instrumentation to precise obturation and restoration. By following these steps, endodontic success can be achieved with minimal complications. Proper post-operative care and follow-ups are essential to ensure the longevity of the treated tooth.
For dental professionals, mastering this procedure enhances patient satisfaction and contributes to successful dental practice growth.
Have a look at this video to understand the process visually.


