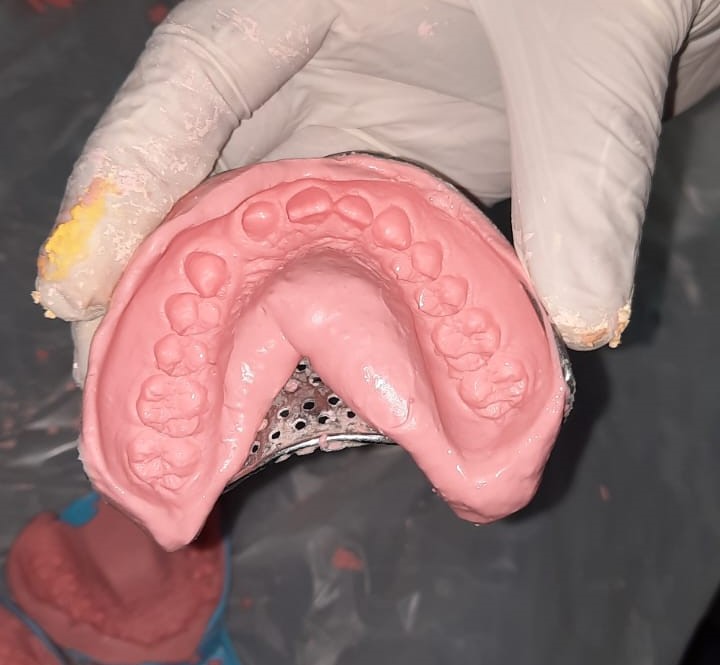
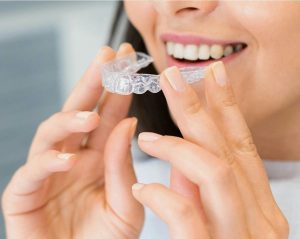
When preparing for a dental crown or bridge, the impression process is crucial. It ensures that your dental restoration fits perfectly and functions correctly. In this comprehensive guide, we’ll explore the steps involved in taking a dental crown impression after preparing the tooth, the materials used, and what patients can expect during the procedure.
Table of Contents
Introduction to Dental Crown and Bridge Impressions
Dental impressions are a vital step in creating crowns and bridges. They capture a precise replica of your teeth and gums, which helps in designing a restoration that fits seamlessly into your mouth. This blog will guide you through every aspect of the impression procedure, ensuring you understand its importance and what to expect.
Why Impressions are Essential for Crowns and Bridges
The success of a dental crown or bridge depends largely on the accuracy of the impression. A well-taken impression ensures that your restoration will not only fit well but also look natural and function correctly. Without a precise impression, there’s a risk of gaps, poor fitting, and discomfort, which could lead to further dental issues.
The Procedure for Dental Crown and Bridge Impressions
Tooth Preparation
Before taking an impression, your dentist must prepare the tooth or teeth that will receive the crown or bridge. This process involves removing a portion of the enamel to create space for the crown. The tooth is then shaped to accommodate the restoration. Proper tooth preparation is critical, as it ensures the crown or bridge will fit snugly and align with adjacent teeth.
Application of Gingival Retraction
Once the tooth is prepared, a gingival retraction cord is often placed around the tooth. This helps to push the gum tissue away from the tooth, creating a clear margin for the impression material to capture.
Choosing the Impression Tray
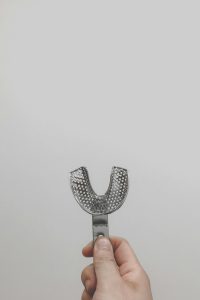
The next step involves selecting an impression tray that will fit comfortably in your mouth while covering all the teeth and gums that need to be included in the impression. The tray is either pre-made or custom-fitted depending on your dental needs.
Taking the Impression
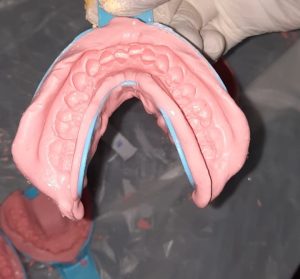
Once the tooth is prepared and the tray is selected, the dentist will proceed to take the impression. The impression process typically involves the following steps:
- Mixing the Material: The impression material is mixed to the correct consistency, ensuring it captures all the details of your teeth and gums.
- Inserting the Tray: The tray is filled with the impression material and inserted into your mouth, covering the prepared tooth and surrounding areas.
- Setting Time: You will need to bite down gently and hold still while the material sets. This usually takes a few minutes.
Removing the Impression
Once the material has set, usually within a few minutes, the tray is gently removed from your mouth. This negative mold of your teeth and gums is then sent to a dental lab, where your custom crown or bridge will be made.
Post-Impression Care
After the impression is taken, it is sent to a dental laboratory where the crown or bridge is fabricated. The impression is critical to ensuring that the restoration fits perfectly, avoiding the need for adjustments. Your dentist may place a temporary crown or bridge while the permanent restoration is being made, which can take a few weeks.
Temporary Crown Impression: The Importance of Accuracy
Taking an accurate impression for a temporary crown is just as important as for the final restoration. A poorly fitting temporary crown can cause discomfort, impact your bite, and even delay the fitting of the permanent crown.
Steps for an Accurate Temporary Crown Impression
- Tooth Preparation: The tooth is shaped to accommodate the temporary crown.
- Selecting the Tray: A properly fitting impression tray is chosen.
- Impression Material Application: The tray is filled with an appropriate impression material.
- Placement and Removal: The tray is placed over the tooth, allowed to set, and then removed carefully.
An accurate impression ensures that your temporary crown fits well, protecting your tooth while you wait for the permanent crown.
Temporary Bridge Material: What You Need to Know
Temporary bridges are often placed while you wait for your permanent restoration. These temporary restorations help protect the prepared teeth and maintain proper alignment in your mouth.
Common Materials Used
- Acrylic Resin: Widely used for temporary bridges, providing a decent aesthetic and functional solution until the permanent bridge is ready.
- Composite Resin: Offers better aesthetics and durability compared to acrylic but may come at a higher cost.
Temporary bridges play a crucial role in ensuring that your teeth and gums are protected and that your final restoration will fit perfectly.
Crown and Bridge Impression Materials
Impression materials are designed to accurately capture the details of your teeth and gums. They come in various types, each with specific properties suited to different dental procedures.
Types of Impression Materials
- Polyether: Known for its precision and stability, ideal for capturing fine details.
- Vinyl Polysiloxane (VPS): Popular for its accuracy and ease of use, offering excellent tear resistance.
- Alginate: Commonly used for preliminary impressions, less precise but quick and easy to use.
Each material has its benefits, depending on the specific requirements of your dental restoration.
Properties of Good Impression Materials
The best impression materials for crowns and bridges share certain characteristics:
- Accuracy: They must capture fine details of the tooth structure.
- Stability: They should maintain their shape without distortion.
- Ease of Use: The material should be easy for the dentist to work with and comfortable for the patient.
Crown Impression Material: Key Types and Their Uses
When it comes to taking impressions specifically for crowns, the choice of material is crucial. Polyvinyl siloxane (PVS) and polyether are the two most common materials used due to their high accuracy and stability. PVS is particularly favored because it is easy to manipulate and offers excellent detail reproduction. Polyether, on the other hand, is known for its rigidity, which is beneficial in situations where the material needs to capture the fine details of a crown preparation.
Polyether
Polyether is a popular choice for crown impressions due to its excellent dimensional stability and detail accuracy. It is especially useful in complex cases where precision is critical.
Vinyl Polysiloxane (VPS)
VPS is another widely used material in crown impressions. It provides a highly accurate mold with superior elasticity, making it easy to remove from the mouth without distortion. It’s also moisture-resistant, which is advantageous in a wet environment like the mouth.
Alginate
While not typically used for final impressions in crown and bridge procedures due to its lower accuracy, alginate is often used for preliminary impressions. It is a quick-setting material, which makes the process comfortable and swift for the patient.
Best Impression Material for Crown and Bridge Procedures
The best impression materials for crowns and bridges are those that offer a balance of accuracy, ease of use, and patient comfort. Polyvinyl siloxane (PVS) is often considered the best option due to its superior detail reproduction and stability.
Polyether is another top choice, especially for its ability to capture intricate details without distortion. Dentists often choose these materials based on the specific needs of the patient and the complexity of the restoration.
Advantages of Polyether
- High accuracy
- Stable under pressure
- Ideal for deep margins
Advantages of VPS
- Excellent tear resistance
- Superior elasticity
- Moisture-tolerant
The choice of material will also depend on the patient’s unique dental condition, including the presence of moisture, the depth of the preparation, and the desired final outcome.
Understanding Alginate Impressions for Crowns
Alginate is a popular material for taking preliminary impressions due to its quick setting time and ease of use. However, it is generally not recommended for final crown and bridge impressions because it lacks the dimensional stability and fine detail capture needed for these restorations.
When is Alginate Used?
Alginate is typically used in the initial stages of treatment planning, such as for making study models or preliminary impressions. Its ease of use and affordability make it a go-to material for these purposes. However, for final impressions, more precise materials like polyether or VPS are preferred.
What to Expect After Your Dental Impression is Taken
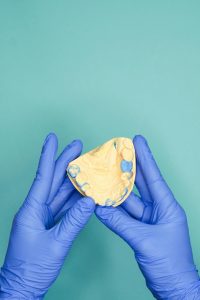
After the impression is taken, the dental lab will use the mold to create your crown or bridge. This process typically takes one to two weeks. During this time, you may have a temporary crown or bridge in place. It’s important to follow your dentist’s care instructions to ensure the best outcome.
Care Tips After an Impression
- Avoid hard or sticky foods that could dislodge your temporary crown or bridge.
- Maintain good oral hygiene, but be gentle around the temporary restoration.
- Attend follow-up appointments to monitor the fit and comfort of the temporary crown or bridge.
Conclusion
Dental impressions are a vital component of the crown and bridge process, ensuring that restorations fit perfectly and function correctly. The materials and techniques used in taking these impressions have a significant impact on the final outcome. From the initial tooth preparation to the selection of impression materials, each step is crucial for the success of the treatment. By understanding the importance of these processes, patients can feel more confident in their dental care and the longevity of their restorations. For the best results, it’s always advisable to discuss any concerns with your dentist, who can provide personalized advice based on your specific needs.

